


Injuries to the Hand are common, and knowing how to properly bandage your left Hand at home can be crucial. Whether it’s a minor cut, a sprain, or a more significant injury, effectively caring for your left Hand can help prevent infection, reduce pain, and promote faster healing. This guide will walk you through the steps of bandaging your left Hand at home and help you determine when to seek professional medical help.

Understanding the Importance of Proper Bandaging
Proper bandaging is essential for several reasons. First, it helps protect the wound from dirt and bacteria, reducing the risk of infection. Second, it can help immobilize the injured area, which is particularly important for sprains, strains, and fractures, allowing the tissues to heal more effectively. Lastly, bandaging can help reduce swelling and provide support, making it more comfortable to use your Hand during the healing process.
Types of Hand Injuries
Hand injuries can vary widely, from minor cuts and abrasions to more severe injuries like fractures and deep lacerations. Here are some common types of hand injuries that might require bandaging:
- Minor Cuts and Abrasions are the most common hand injuries from everyday activities. With proper care and protection, they usually heal on their own.
- Sprains and Strains: These injuries involve the ligaments and muscles in the Hand. They can be caused by falls, overuse, or sudden impacts.
- Fractures: A broken bone in the Hand requires immobilization and professional medical attention. However, initial bandaging at home can help stabilize the injury until you can see a doctor.
- Burns: Burns to the Hand can range from minor to severe. Proper bandaging can protect the burn and promote healing.
- Puncture Wounds: Sharp objects can penetrate the skin and cause these injuries. Proper bandaging can help prevent infection.
Preparing to Bandage Your Left Hand
Before you begin bandaging your left Hand, gather all necessary supplies. Having everything ready will make the process smoother and more efficient. Here’s what you’ll need:
- Clean Water and Soap: To clean the wound and your hands.
- Antiseptic Solution: To disinfect the wound.
- Sterile Gauze Pads: These are used to cover the wound.
- Adhesive Bandages: These are used to secure the gauze pads in place.
- Elastic Bandage or Tape: This is for additional support and immobilization.
- Scissors: Cut the bandage material to the appropriate length.
- Disposable Gloves: To maintain a sterile environment while bandaging.
Cleaning the Wound
Proper cleaning is the first and most critical step in bandaging any wound. Follow these steps to ensure the wound is clean:
- Wash Your Hands: Use soap and warm water to thoroughly wash your hands. This helps prevent bacteria from introducing into the wound.
- Clean the Wound: Rinse the wound with clean water to remove dirt or debris. Use mild soap if necessary, but avoid getting soap directly into the wound, as it can irritate.
- Disinfect the Wound: Apply an antiseptic solution to the wound to kill any remaining bacteria. Follow the instructions on the antiseptic packaging.

Applying the Bandage
Once the wound is clean, you can begin the bandaging process. Follow these steps for a secure and effective bandage:
- Place a Sterile Gauze Pad on the Wound: This will help absorb fluids and protect the wound from further injury.
- Secure the Gauze Pad with Adhesive Bandages: Place adhesive bandages around the gauze pad to hold it. Ensure they are not too tight, which can restrict blood flow.
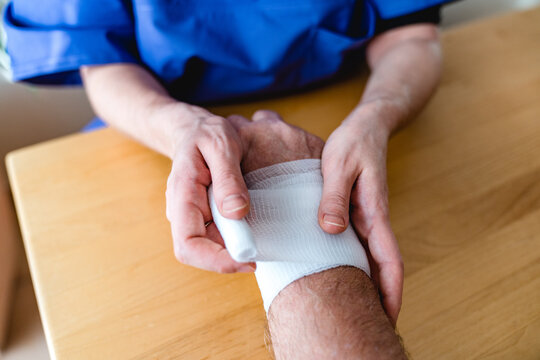
- Wrap the Hand with an Elastic Bandage: Starting from the wrist, wrap the elastic bandage around your Hand, covering the gauze pad. Be sure to wrap it snugly but not too tightly, as this can cause discomfort and swelling.
- Secure the End of the Bandage: Use tape or the fasteners provided with the elastic bandage to secure the end in place.
Monitoring the Injury
After bandaging your left Hand, it is important to monitor the injury closely. Look for signs of infection, such as increased redness, swelling, warmth, or discharge. If you notice any of these signs, seek medical attention immediately.
When to Change the Bandage
Change the bandage daily or whenever it becomes wet or dirty. This helps keep the wound clean and reduces the risk of infection. Follow these steps to change the bandage:
- Wash Your Hands: Wash your hands thoroughly before removing the old bandage.
- Remove the Old Bandage: Carefully remove it and dispose of it properly.
- Clean the Wound: Rinse the wound with clean water and reapply the antiseptic solution if necessary.
- Apply a New Bandage: Follow the steps outlined above to apply a new bandage.
When to Seek Professional Help
While many minor injuries can be managed at home, there are times when professional medical attention is necessary. Here are some situations where you should seek help:
- Severe Pain: If the pain is severe and doesn’t improve with over-the-counter pain medication, seek medical attention.
- Heavy Bleeding: If the wound is bleeding heavily and doesn’t stop after 10-15 minutes of applying pressure, go to the emergency room.
- Signs of Infection: As mentioned earlier, increased redness, swelling, warmth, or discharge are signs of infection that require professional care.
- Loss of Function: If you cannot move your Hand or fingers properly, seek medical help immediately.
- Deep Wounds: Deep cuts or puncture wounds may require stitches or other professional treatments.
- Fractures: Getting an X-ray and proper medical care is essential if you suspect a fracture.
Tips for Healing and Recovery
Proper bandaging is just one part of the healing process. Here are some additional tips to help your left Hand recover more quickly.
- Rest: Avoid using your injured Hand as much as possible. Resting the Hand will help speed up the healing process.
- Elevation: Keep your Hand elevated above heart level to reduce swelling. This is especially important in the first 24-48 hours after the injury.
- Ice: Apply ice to the injured area for 15-20 minutes at a time, several times a day. This can help reduce pain and swelling.
- Compression: Using an elastic bandage to compress the injured area can also help reduce swelling. Just be sure not to wrap it too tightly.
- Stay Hydrated and Eat Well: Proper nutrition and hydration are essential for healing. Drink plenty of water and eat a balanced diet rich in vitamins and minerals.
- Follow Up with Your Doctor: If you’ve seen a doctor for your injury, be sure to follow their instructions and attend any follow-up appointments.
Conclusion
Knowing how to properly bandage your left hand bandaged hand at home is a valuable skill that can help you manage minor injuries effectively. Following the steps outlined in this guide can protect your wound, reduce pain, and promote faster healing. Remember to monitor the injury closely and seek professional medical attention if necessary. With the right care and attention, your left Hand will be on the road to recovery in no time.
Also, Read the following: how long until a tooth infection kills you.